Confusion about equipment should never stand in the way of your cross-country experience. As a newcomer, you should embrace the sport rather than be deterred by all of the information out there. I understand how confusing the cross-country equipment selection process can be as a beginner. You want to hit the trails as soon as possible, good equipment be damned! However, I implore you to take the time to find the best equipment possible, experimenting and making investments where necessary, before indulging in your new passion! Best is always renting equipment before buying so you can learn more about how the respective pieces of equipment work and discover what you like.
Once you have become comfortable with the sport and experimented with different skis, boots, and poles, you can invest in your own equipment. Keep in mind that cross-country skiing is an endurance sport and that better quality equipment will take you the distance! Better quality products will enable you to perfect your craft while maximizing your enjoyment of the sport. Poor quality equipment will impede your skill development and will hinder your enthusiasm. That is a guarantee.
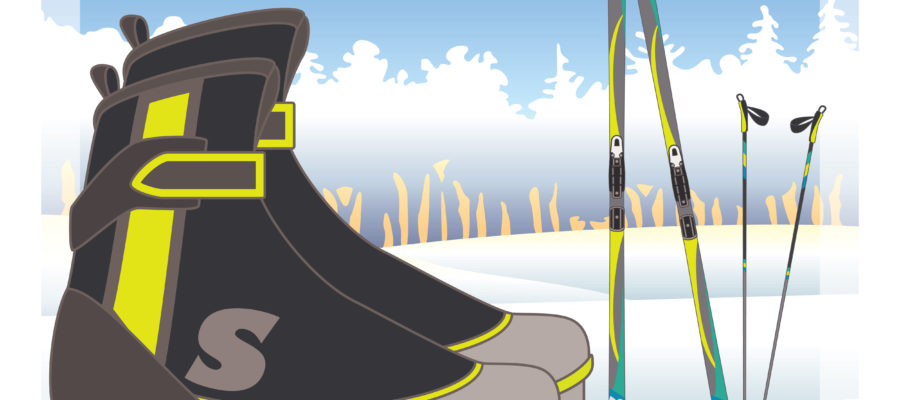
The basic equipment required are as follows: skis with bindings, boots, and poles. This is by no means an exhaustive guide on the gear available for cross-country skiers, but in this article, I will be focusing on the fundamentals.
What is a Cross-country Ski?
Cross-country skis differ from downhill skis in that they are much narrower and are designed to be used on groomed trails. They are also designed to be partly used on open terrain (nordic cruising). They are much narrower and lighter than alpine skis and have only a minimal sidecut, if they have one at all. As cross-country skiing is usually undertaken on flatter terrain, cross-country skis are designed more for gliding than downhill skiing.
Cross-country skis have a relatively high camber, which is visible through the curved shape in their longitudinal sections. In addition, the base of the ski is subdivided into three zones: the front gliding zone in the area near the front binding, the grip/kick zone under the binding, and the sliding zone at the rear of the ski.
Classic or Skating – Find Your Technique
Cross-country skiing has two main technique branches: classic and skating. The style you partake in will dictate what equipment you will need. Each technique necessitates its own respective suite of skis, bindings, shoes, and poles. Classic cross-country skis differ from skating skis not only in their length but also in their configuration.
The best way to start cross-country skiing is by mastering the classic technique. If you are an experienced inline skater, you could certainly dive right into the skating technique, but otherwise, I generally suggest learning the basics of classic before moving on and branching out.
Classic Cross-country Skis
Classic touring skis are designed for groomed trails (tracks). They are slightly longer than skating skis and are significantly more narrow and lightweight. These characteristics make the skis fast and efficient.
Race and performance classic skis are similar to recreational touring skis, but they are built for faster, more aggressive skiing. Race and performance skis generally have a stiffer flex than touring skis, making them less forgiving for beginners.
Metal-Edge Varieties
Touring skis also come in metal-edge varieties. These are designed for off-track and steeper terrain. These varieties are shorter and easier to maneuver. They are also wider for more stability in deep snow. The metal edges allow them to maintain grip in icy conditions. The greater sidecut enhances the ability to turn on steeper slopes, as well. All of these features make them heavier than touring skis, but they are leagues better for off-track terrain.
Wax or Non-Wax?
Classic cross-country skis are divided into two groups: wax and non-wax skis. This refers to whether or not the skis require the use of kick (or grip) wax to provide the traction necessary to sustain forward motion. No-wax skis have been manufactured with a textured pattern in the kick zone and do not require kick wax for traction.
No-wax skis are great for newcomers because they offer the added benefit of convenience. Simply put, you don’t need to apply kick wax every time you go on a skiing excursion. On the other hand, wax skis that utilize kick wax offer better performance. Generally speaking, in stable temperatures, properly waxed skis will glide better than no-wax skis while still providing excellent grip. When temperatures are inconsistent finding the correct wax can be more challenging, and no-wax skis are the best choice. No-wax skis are suitable for recreational skiers who don’t need to be the fastest skier on the trails!
No-Wax Skis
There are two main varieties of no-wax skis: fish-scale and skins. Many no-wax ski varieties utilize a fish-scale structure in the kick zone. They are intricately designed and allow you to glide without wax. To prevent icing, fish scale skis can be treated with a spray.
Skin no-wax skis come equipped with a climbing skin that provides the necessary grip. Skin no-wax skis generally offer better grip and are the no-wax ski of choice for more competitive skiers. They require slightly more care than their fish scale counterparts, but they perform well under most conditions. Skin no-wax skis have surged in popularity in recent years, and more and more nordic skiing enthusiasts are swearing by the performance and convenience of this particular variety!
Skating Skis
The skating technique is normally the more exhausting technique. It requires significant physical exertion and energy levels.
Skating is generally undertaken on hard-packed snow, and therefore these skis tend to have a stiffer flex. They are generally about 10 centimeters shorter than their classic ski counterparts. A good rule of thumb to keep in mind is that the narrower a ski is, the faster it moves. Skating and racing skis are therefore narrower than their touring and classic cousins. Most skating skis have no sidecut (that long, inward side curve portion).
Skating skis have a less-pronounced arch from tip to tail than the raised, high-arch “wax pocket” found on touring and classic skis. This shape allows you to push off with the edge of the angled ski more efficiently than you could on the curved shape of classic touring skis. Most skating skis have waxable bases. Skating skis require glide wax but not kick/grip wax. This is because a skate skis edges are the source of traction and forward momentum, rather than the base.
Once you have decided on the technique (classic or skating) of skiing, you will undertake you can begin to take into consideration other factors that will help you choose your best fit.
Identify the Camber of the Ski and the Ski Flex
Camber may be a term that you are unfamiliar with. It refers to the bow of the ski. It affects the flex and strength of the ski. When you apply equal body weight to both of your skis the grip zone should remain slightly bent off of the snow to ensure a smooth glide.
The flex of the ski influences the speed and turning power of the ski. The stiffer the flex, the harder it will be to climb once in the snow. A stiff flex requires more effort and more skilled cross-country technique. It also demands a mastery of balance. That being said, a ski with a stiff flex allows you to slide more efficiently and pick up more speed. Beginners and recreational athletes without competitive ambitions tend to look for a more soft-flex ski. A soft-flex ski grips the snow better and allows you to enjoy the sport with less effort, at slower speeds.
The Importance of Height and Body Weight
Understanding your body weight and height is invaluable to choosing the best skis for you. When you place all of your weight on one ski, you completely flatten it against the snow so that the ski can grip the snow and provide traction for forward motion. Your ski length and size must be proportionate to your weight and height otherwise you will not achieve good results when it comes to traction and agility.
Your body weight and height will determine the length of the skis you choose. Shorter skis are easier to get a handle on for beginners and recreational skiers, but they don’t achieve the speed that longer skis do. If you want to advance in your practice and become an expert, you should embrace the learning curve that longer skis offer.
Shorter classic skis are generally 10-15 centimeters longer than your own height lying down. Advanced skiers who choose a longer model usually add an additional 5 centimeters to this length. Skating skis are shorter in general, so a good guide is to add eight centimeters in length when compared to your body height for beginners and ten centimeters for experts.
Your weight also comes into play. Heavier skiers should add an extra five centimeters (give or take), and lighter skiers should consider choosing a ski that is roughly five centimeters shorter than the guidelines listed above.
Here is a nifty little refresher:
- Classic beginner – body size + ten to 15 centimeters
- Classic advanced – body size + 15 to 20 centimeters
- Skating beginner – body size + eight centimeters
- Skating advanced – body size + ten centimeters
- Light body mass – as above minus five centimeters
- Heavy body mass – as above + five centimeters
Ski width is measured at 3 locations.
- The tip (the widest point near the front of the ski)
- The waist (the narrowest point near the middle of the ski)
- The tail (near the back of the ski).
If you want a pair of skis for both groomed trail and out-of-track touring look for a touring ski that is roughly 65 to 70 mm without metal edges. Skis wider than 70 mm are not allowed in some ski centers.
Choosing Boots
Cross-country skiing boots are specially developed for use with cross-country skis and cross-country skiing. There are both skating and classic shoes, each specialized for their respective discipline and there are also combination shoes, which can be used for both cross-country styles interchangeably.
Skating Boots
When it comes to skating the stability of the boot is of key importance. Skating boots are equipped with a high shaft that covers the ankle for maximum sturdiness. They have a tougher sole than classic boots in order to maintain minimal distance between the foot and the ski. These boots provide comprehensive stability and allow you to ski with ease. There are lace-up and buckle models. Neither is superior to the other and comes down to personal preference.
Classic Boots
Classic cross-country boots have a lower shaft than skating boots. The sole construction is softer and allows for heightened freedom of movement. This allows you to move the foot more flexibly without restriction. Most classic boots are lace-up.
Combination Shoes
Combination shoes are suitable for both classic and skating skiing. They have a medium-hard sole which strikes a happy medium between the two respective types. They are typically equipped with a removable shaft or a shaft clip that can be either removed or left open. These hybrid boots allow you to walk without sacrificing the stability that skating skis offer.
Combination shoes are a good choice for skiers who partake in both techniques and want the flexibility and utility of a multi-purpose boot. They are best for non-specialized, recreational skiing. Keep in mind that the binding system must also be compatible with combination shoes.
Choosing Children’s Cross-Country Skis
Cross-country ski boots for children are typically softer. Combination shoes are a sound choice because they offer both comfortable movement and stability. Otherwise, children’s boots are very similar to adult boots and the guidelines for choosing the best pair are similar.
Shoes, bindings, and skis should be regarded as one unit when it comes to cross-country skiing. The shoe system should, as a rule, be compatible with the binding.
Understanding Bindings
When it comes to cross-country bindings which should you choose? SNS or NNN; Rottefella or Salomon? I know how confusing all of these new terms are – here is a short and easy overview:
- SNS means Salomon Nordic System. This binding system is used by the namesake brand Salomon, but also by other cross-country manufacturers.
- NNN stands for New Nordic Norm, a binding system from Rottefella that is also used by Fischer and Rossignol. The two systems differ in structure and can not be mixed with each other. An NNN binding requires an NNN shoe, and an SNS binding requires an SNS shoe.
- NIS is a subform of NNN. The binding uses the Rottefella system. You can mount NNN bindings without using a NIS plate.
- Turnamic IFP is a new subset of NNN binding developed by Fischer and Rossignol which provides improved coordination between ski, binding, and shoe. The Turnamic soles and bindings are compatible with the NNN sole profile.
- Salomon has recently launched the Prolink system which allows Salomon products to be used with other systems as well. Prolink is a system that is compatible with NNN shoes. Prolink shoes can also be used with an NNN binding. There are usually two types of Salomon shoes and bindings: SNS and Prolink.
Which System is Best?
There is no clear, decisive answer when it comes to choosing the best boot and binding system. Both systems, SNS and NNN, have their adherents and both are utilized in the cross-country World Cup. Choosing a system comes down to previous experience, skill level, and design preference. Your cross-country bindings must match your preferred technique and be compatible with the boot you have selected.
The main difference between classic and skating bindings is that for classic cross-country ski bindings, the connection to the shoe is generally softer. This is necessary due to the rolling motion that your foot must undertake during the parallel technique. When skating, the ski must remain as close to the foot, so a harder rubber is necessary.
Choosing Poles
As with cross-country skis, boots, and bindings, the choice of poles also depends on the technique chosen, with the difference limited to one significant factor: pole length. Classic poles are typically shorter than skating poles. The pole length must be suited to your technique and your body weight and height otherwise you will not achieve optimal performance. The results of poorly selected poles are fatigue and difficulty braking. Poorly sized poles can feel unwieldy and can be frustrating to use, ultimately impacting your enjoyment out on the trails.
For recreational skiers I recommend length-adjustable poles. They can be adjusted to provide optimum performance for both the classic and skating techniques.
The Role of Material
Ski poles come in a variety of materials, the most common being aluminum, fiberglass, and carbon.
The material impacts the hardness and the swinging behavior of the pole. All of the materials mentioned above are suitable for achieving the best performance for both classic and skating. Aluminum poles are conventionally used by recreational skiers and beginners whereas carbon poles are used by more advanced skiers. Carbon poles are generally more expensive, but they certainly strike a desirable price-performance balance as they deliver optimum power transmission.
Handles: Cork or Plastic?
The handles of cross-country skis should always be comfortable and easy to grip. They must be sturdy and not slippery. Cork is generally warmer, but plastic has tangible insulating properties.
The hand straps must be adjusted to the individual skier for the best results. The length should be selected so that the hand has the flexibility of movement. The loop straps lie in the palm of your hand.
The poles I am using have a detachable loop system. The Leki Trigger Shark system is famous for that. The loop is tightened and clicked into the sticks. If you need to remove your hand to drink something or take a picture you can simply click a button to free them. In the event of a fall, the Trigger Shark system releases itself from the pole, reducing the risk of injury.
Which is the ideal Length for Cross-Country Ski Poles?
To find out the ideal length of cross-country ski poles, there is a simple calculation formula which takes into account your skill level. To avoid overloading and tension, cross-country ski poles must fit the athlete’s body size. Roughly speaking, the loop exit on classic sticks should extend to the armpit. I have listed the simple formula below.
- Classic beginner – Body Size in cm size x 0.82
- Classic Advanced – Body Size in cm x 0.84
- Skating beginners – Body size in cm x 0.87
- Skating Advanced – Body Size in cm x 0.89
Conclusion
I hope this quick guide has given you some insight into choosing the best skis, boots, bindings, and poles for your skiing adventures. This primer was designed to give you a broad understanding of the different variables at play when it comes to choosing the best equipment.
Remember the most important lesson: try first – then buy! It is always best to experiment with different techniques, skis, boots, and poles before investing in one. You may discover that ‘classic’ skiing is too slow for you or that skating is too exhausting – every individual skier has unique preferences. When you learn about what kind of skier you are, whether a leisurely Nordic cruiser or a competitive speed skater, you are better prepared to find the best equipment and get the most out of the sport.